John Rankin @ August 16, 2018
Hello Everyone!
I've signed up for a Free account with AWS and will be diving in and playing around with their cloud platform. The purpose here is for me to document what I've done, and what I feel about it.
Right after registering, you are brought to a Tutorials Dashboard where Amazon gives you a examples to get started.
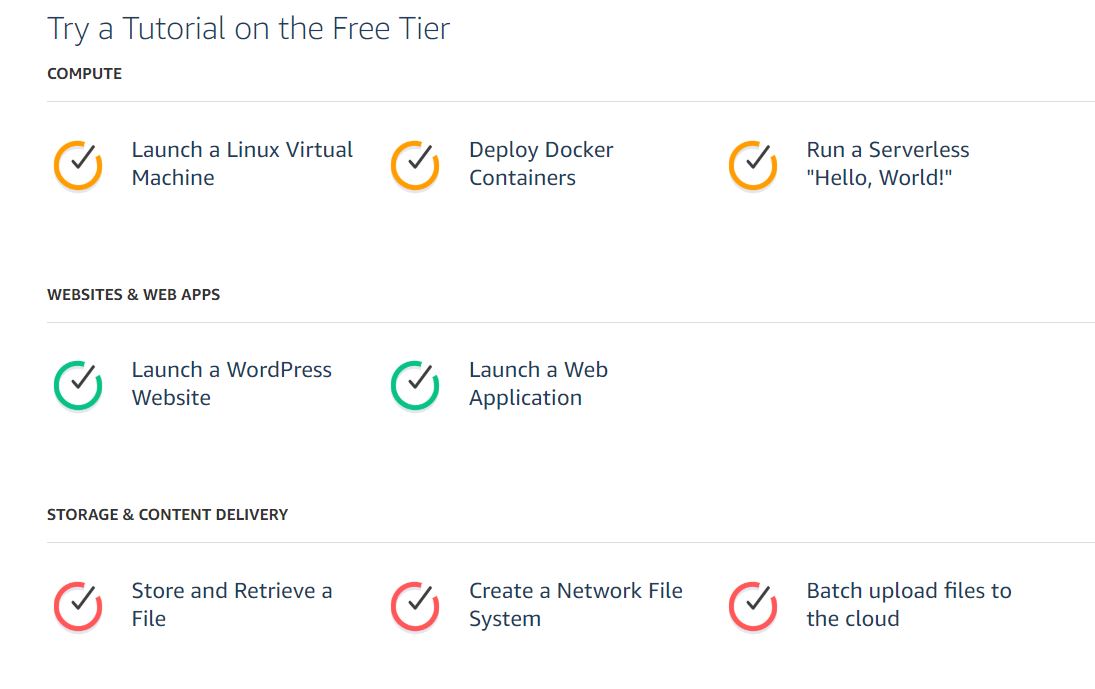
Unfortunately the first Tutorial, Launch a Linux Virtual Machine , redirects me to a 404 Page, but I was able to find a tutorial by messing around with the URL, hopefully its the correct version.
To Create an Instance:
- Select an Image for your Instance
- Select how much HW you need
- Create SSH Keys for your instance and prepare to save them to your Linux and/or Windows box for access
- Launch Instance.
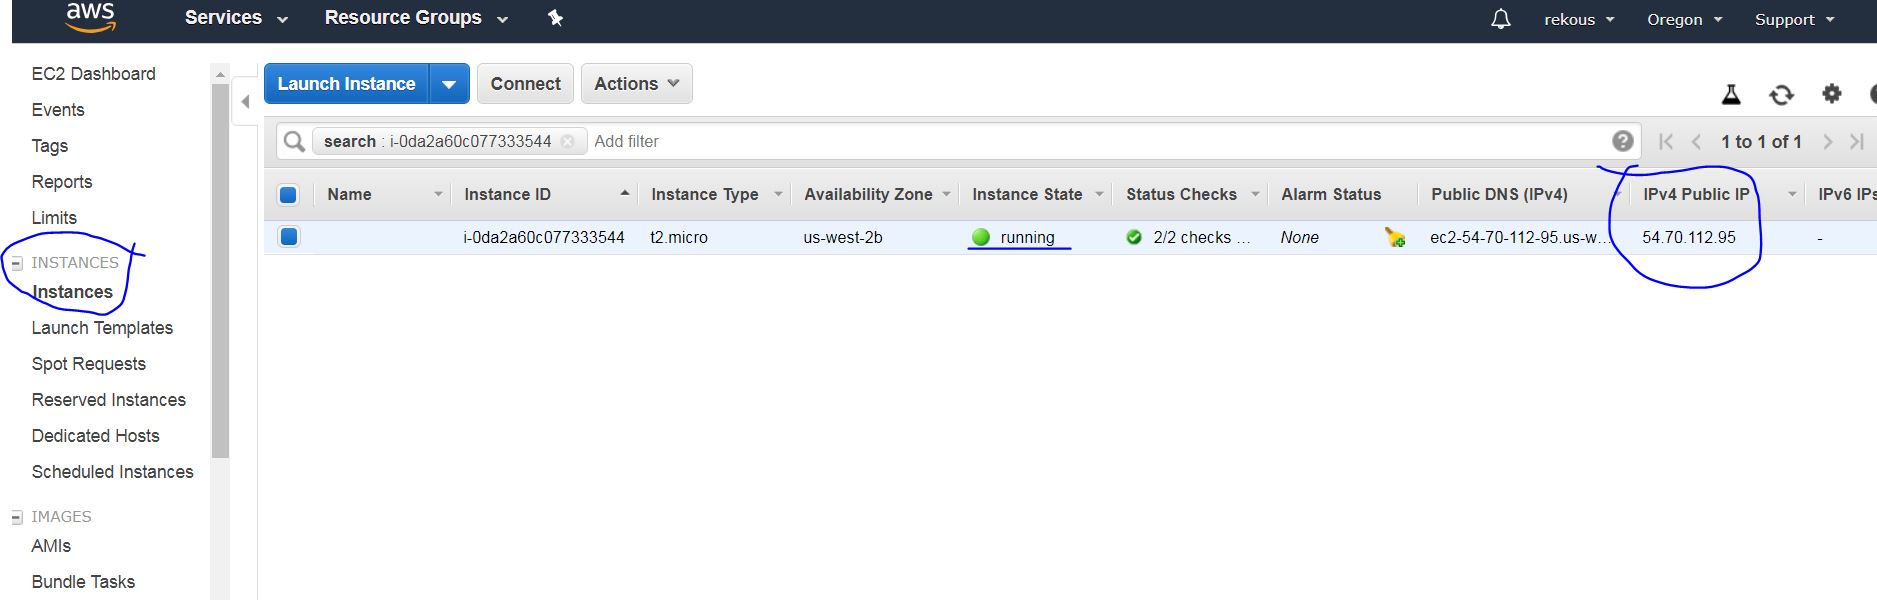
You can then take a look at your running instances from the Admin dashboard, by navigating to "Instances -> Instances"
Connect to EC2 Instance:
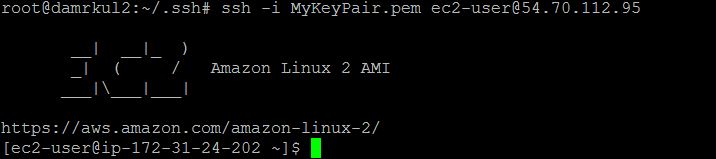
One thing that I noticed that was different between Digital Ocean and EC2 is that It appears the first connection needs to actually use my SSH key. So I took my SSH key, so I did the following:
- Took the SSH key i downloaded while creating the instance and put it on my linux box under the ~/.ssh/ folder.
- chmod 400 ~/.ssh/MyKeyPair.pem
- To connect to the instance, I did the following:
- ssh -i ~/.ssh/MyKeyPair.pem ec2-user@{IP_Address}
Install AWS Command Line tools on your Linux Workstation:
I probably wont want to go through a website everytime I want to do something on AWS, and If I ever want to script something I best assume I should install these tools on my linux workstation.
In order to do this you, need to setup an AWS access key and secret key.
- You need to log into "My Security Credentials" ...
- Create a user
- Create a Group and assign permissions for it ( I just picked Full Admin access).
- You are then given your access key, and a CSV file to download.
After that, install the CLIsoftware.
pip install awscli --upgrade --user- I just did 'apt-get install awscli' on ubunu.
- echo 'export PATH=~/.local/bin:$PATH' >> ~/.bashrc ; source ~/.bashrc
- aws configure
- Use the credentials file you put in your ACCESS key, Secret Key.
- For region, enter the "Availability Zone" for your current instance, for myself, I used us-west-2
To verify AWS CLI is working... lets run a few commands.
Firstly, it appears the aws CLI returns JSON. that will make it easy in the future for parsing, but for now lets just get the instanceID.
root@damrkul2:~# aws ec2 describe-instances | grep -i InstanceId
"InstanceId": "i-0da2a60c077333544",
Next, lets take that ID and call get-console-output to pull what would be currently shown on the Console/Monitor output.
root@damrkul2:~# aws ec2 get-console-output --instance-id i-0da2a60c077333544
{
"Timestamp": "2018-08-16T16:42:24.000Z",
"InstanceId": "i-0da2a60c077333544",
"Output": "[ 0.000000] Linux version 4.14.47-64.38.amzn2.x86_64 (mockbuild@ip-10-0-1-219) (gcc version 7.3.1 20180303 (Red Hat 7.3.1-5) (GCC)) #1 SMP Mon Jun 18 22:33:07 UTC 2018\r\n[ 0.000000] Command line: BOOT_IMAGE=/boot/vmlinuz-4.14.47-64.38.amzn2.x86_64 root=UUID=76e177a9-8195-43cf-84ae-14ea371008b6 ro console=tty0 console=ttyS0,115200n8 net.ifnames=0 biosdevname=0 nvme_core.io_timeout=4294967295\r\n[ 0.000000] x86/fpu: Supporting XSAVE feature 0x001: 'x87 floating point registers'\r\n[ 0.000000] x86/fpu: Supporting XSAVE feature 0x002: 'SSE registers'\r\n[ 0.000000] x86/fpu: Supporting XSAVE feature 0x004: 'AVX registers'\r\n[ 0.000000] x86/fpu: xstate_offset[2]: 576, xstate_sizes[2]: 256\r\n[ 0.000000] x86/fpu: Enabled xstate features 0x7, context size is 832 bytes, using 'standard' format.\r\n[ 0.000000] e820: BIOS-provided physical RAM map:\r\n[ 0.000000] BIOS-e820: [mem 0x0000000000000000-0x000000000009dfff] usable\r\n[ 0.000000] BIOS-e820: [mem 0x000000000009e000-0x000000000009ffff] reserved\r\n[ 0.000000] BIOS-e820: [mem 0x00000000000e0000-0x00000000000fffff] reserved\r\n[ 0.000000] BIOS-e820: [mem 0x0000000000100000-0x000000003fffffff] usable\r\n[ 0.000000] BIOS-e820: [mem 0x00000000fc000000-0x00000000ffffffff] reserved\r\n[ 0.000000] NX (Execute Disable) protection: active\r\n[ 0.000000] SMBIOS 2.7 present.\r\n[ 0.000000] DMI: Xen HVM domU, BIOS 4.2.amazon 08/24/2006\r\n[ 0.000000] Hypervisor detected: Xen HV
So you can see here that our CLI is now working. Great!
Since this tutorial is done... we can go back to the EC2 Admin dashboard, go to the instance's list, and Terminate that way.
Or we simply run the CLI :
root@damrkul2:~# aws ec2 terminate-instances --instance-id i-0da2a60c077333544
{
"TerminatingInstances": [
{
"PreviousState": {
"Code": 16,
"Name": "running"
},
"CurrentState": {
"Code": 32,
"Name": "shutting-down"
},
"InstanceId": "i-0da2a60c077333544"
}
]
}
Since we only have 1 instance at the momemt.. For now, you can simply grep the State to see if it was terminated..
root@damrkul2:~# aws ec2 describe-instances | grep \"State\" -A 4
"State": {
"Code": 48,
"Name": "terminated"
},
"LaunchTime": "2018-08-16T16:39:04.000Z",